Let's build a Blender Pixabay Addon – Part 1
- Creating a basic addon scaffoldig
- Setting up a build, update and reload process
- Acquiring and Testing the Pixabay API key
- Conclusion
Whenever I do blog posts – especially multi-part ones – on how to do something using the Blender API, I usually have everything figured out. I would have done it at least twice from start to finish, so that I know exactly what is going on.
But this time I only have a vague idea of what I want to do: search images on Pixabay directly from Blender. And I have not done any homework on this topic yet. So, I will be sharing things as I go including any hurdles that I might encounter.
In this part, I will show to how to get the boring but important stuff in place, namely:
-
a basic scaffolding for the addon – this includes creating a panel in a new tab in the 3D View’s properties panel and the
blender_manifest.tomlfile. -
a setup to build, update and reload addons – this is important for us to be able to test changes quickly and efficiently during development.
-
acquiring your Pixabay API key and making a test request using the
requestsmodule.
Creating a basic addon scaffoldig
Let’s first create a new folder named blender_pixabay for our addon. We will use this folder to store the addon source code and other supporting files which we will get to in a moment. Inside this folder, create another directory called src – this is where we will place the actual source code.
To create a basic scaffolding for an addon we need a minimum of two files:
-
__init__.py– this will house the addon’s functionality for now, but in the upcoming parts, we will be structuring our code into multiple files and folders to keep things clean. -
blender_manifest.toml– this file will house the metadata necessary for the modern extensions format.
Let’s start with the manifest file. Inside the src directory create a file named blender_manifest.toml and paste the following into it:
schema_version = "1.0.0"

id = "blender_pixabay"
version = "1.0.0"
name = "Blender Pixabay"
tagline = "Search for images on Pixabay directly from Blender"
maintainer = "John Doe"
type = "add-on"

blender_version_min = "4.2.0"
license = ["SPDX:GPL-3.0-or-later"]

[permissions]
network = "Required to access the Pixabay API"
files = "Required to read/write dowloaded images"
In the above manifest, everything except the permissions is required for any addon. A few things worth noting here:
- The
idis the unique identifier of our addon and controls how it will be exposed and referred to in the Blender API.
-
The
blender_version_minspecifies the minimum Blender version required to use our addon. You are required to at least use4.2.0since that was the first version to support the modern extensions format. -
Based on the functionality of your addon, you have to explicitly declare the permissions you need. For us, the only relevant ones are
networkandfiles, so we have declared those and explain how we plan to use them.
You can read more about the manifest file here.
With the manifest in place, let’s create our main __init__.py file inside the src directory and add the following code to it:
import bpy


class PIXABAY_PT_view3d_panel(bpy.types.Panel):
    bl_label = "Pixabay"
    bl_space_type = 'VIEW_3D'
    bl_region_type = 'UI'
    bl_category = "Pixabay"

    def draw(self, context):
        layout = self.layout

        layout.label(text="Yay!")

def register():
    bpy.utils.register_class(PIXABAY_PT_view3d_panel)

def unregister():
    bpy.utils.unregister_class(PIXABAY_PT_view3d_panel)

if __name__ == "__main__":
    register()
This will create a new tab in the 3D view properties and add a panel to it. Let’s build our addon and see if it works. Open the terminal in the blender_pixabay directory and run the following command:
blender --command extension build \
        --source-dir ./src \
        --output-filepath ./blender_pixabay.zip
Note: If you are using Power Shell on Windows, you have to replace the back slashes at the end of first two lines with back ticks `. Also, the above command will only work if Blender is on system
PATHlist. Otherwise you will have to replaceblenderwith the full path to the Blender executable. Refer to this page for platform specific instructions on finding the path to the Blender executable.
This should build the addon into a .zip package in the blender_pixabay directory. Now fire up Blender and install the package using Preferences > Get Extensions > Install from Disk. Once you have installed, bring up the 3D view properties and you should see something like this:
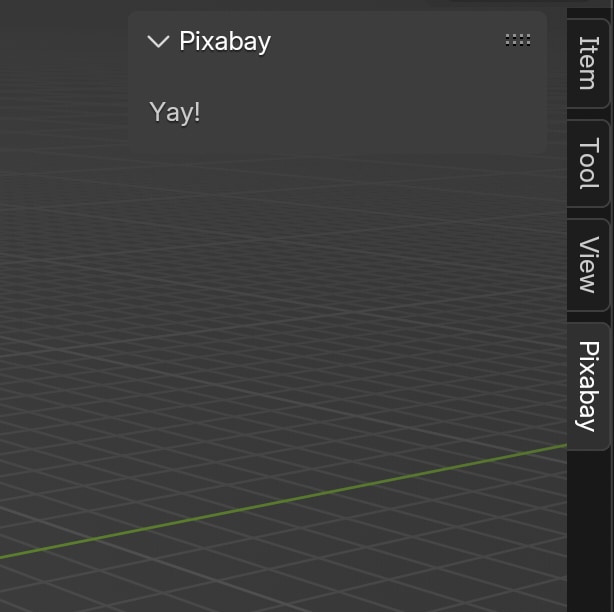
Great. We have our tab and panel in place. But we don’t want to be manually running the build command and reinstalling the addon every time we make a change. So let’s set things up in such a way that it is easy to build and update our addon.
Setting up a build, update and reload process
This is a very subjective area with respect to the Blender API, mainly because there is no official method or tooling to do this. If you are already using the Blender Development VS Code extension, I recommend you stick with that. However, I am gonna show you how you can create a minimal setup from the ground up to achieve the same, because I think it’s a good idea do things yourself first even if you find out later that you want to use another solution.
Creating a Build Script
First, let’s create our build script. This script will be responsible for building the .zip package that we saw in the previous step. For this, create a file named build.py inside the blender_pixabay directory and paste the following code into it:
import os
import subprocess


this_file = os.path.abspath(__file__)
this_dir = os.path.dirname(this_file)

source_dir = os.path.join(this_dir, "src")
output_filepath = os.path.join(this_dir, "blender_pixabay.zip")

# Build extension
subprocess.run([
    "blender",
    "--command",
    "extension",
    "build",
    "--source-dir",
    source_dir,
    "--output-filepath",
    output_filepath
])
The script is dead simple. We get the directory the script file belongs to using the __file__ attribute and methods from the os module. This basically returns the absolute path to our blender_pixabay directory. This is useful because it ensures that our build script would work as expected even if we move this folder to a different location or a different computer.
Then we construct the source_dir (path to the src folder) and output_filepath (path to put the built package in) paths which we will be passing to the build command. And finally we use subprocess.run method to execute the build command. Notice that all we have done here is broken down the build command we saw in the previous step and pass them as a list.
Note: Replace
blenderwith the path to the Blender executable on your system if needed. Refer to the note in the previous section for details.
From here on, we can build our addon simply by running this script instead of typing in the build command every time. Assuming you still have the terminal open from the previous step, delete the blender_pixabay.zip file and try running the script as follows:
python3 build.py
Note: Depending on your system, you might want to use
pythoninstead ofpython3to call the Python interpreter.
If everything went well, you should see the addon package built and placed in our addon’s root folder.
The Build and Reload Process
In it’s current state, if we make a change to our addon we have to do two things for it to reflect inside Blender:
- Run the
build.pyscript - Re-install the addon manually from Preferences
Let’s see if we can make it into one – preferably at the press of a button.
To do this let’s first create a new blend file named testing.blend in our addon’s root directory. Then go to the Scripting workspace, create a new text block in the Text Editor and paste the following code into it:
import bpy
import os
import subprocess


this_dir = os.path.dirname(bpy.data.filepath)
build_script = os.path.join(this_dir, "build.py")
extension = os.path.join(this_dir, "blender_pixabay.zip")

subprocess.run(["python3", build_script])

bpy.ops.extensions.package_uninstall(repo_index=1, pkg_id="blender_pixabay")
bpy.ops.extensions.package_install_files(
    filepath=extension,
    repo="user_default"
)
Note that we are following a similar pattern to our build script. This script simply calls build.py using the subprocess.run method and uses the builtin extensions.package_uninstall and extensions.package_install_files operators to reinstall our addon. The repo_index=1 points to the user_default repo which is where extensions installed from the disk will be placed.
Now, before we test this, let’s make a small change to our __init__.py script:
        ...

        layout.label(text="Yay, again!")

        ...
Make sure you save the file after making the change and then press the ▶️ button in the Blender Text Editor. If everything went well, Blender should have built the updated addon package, reinstalled it, and you should be seeing something like this:
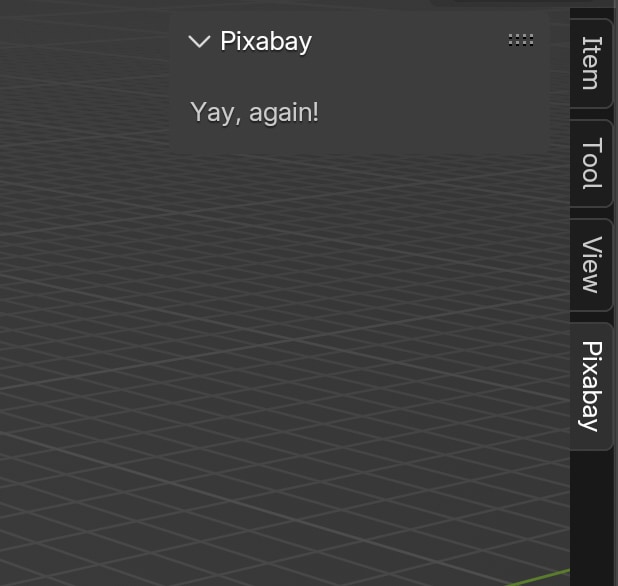
Look at that! With a few lines of code, we have our very own build, update, and reload setup for development. All the work we have done so far will make it easy – and less painful – for us to test things as we go. If you did everything correctly so far, your directory layout should look like this:
blender_pixabay/
    blender_pixabay.zip
    build.py
    testing.blend

    src/
        __init__.py
        blender_manifest.toml
Now, let’s do one last thing before we call it a day – acquiring and testing our Pixabay API key.
Acquiring and Testing the Pixabay API key
First, create your Pixabay account if you haven’t already and visit this link. You can find your API key under the Parameter’s section as the first item on the list. Save this key somewhere safe – we need to pass this key with every request we make.
Now that we have our API key, let’s test it!
To communicate with web services from Python, we can use the requests module. It does not come bundled with Python, but fortunately it does come with Blender’s builtin Python interpreter.
Go back to the Scripting workspace in the testing.blend file and try the following in the Python Console:
>>> import requests
>>> # Replace `PIXABAY_API_KEY` with your actual API key
>>> params = {"key": "PIXABAY_API_KEY", "q": "cat"}
>>> r = requests.get("https://pixabay.com/api/", params=params)
>>> r.status_code
200
If you receive 200 as the status code, it means everything is working as expected. If you are interested in seeing the actual response of the request, type r.text in the Python Console and hit enter. It should print out a long and unformatted JSON string. We will look at how to parse the response and do useful things with it in the next part.
Conclusion
That’s it for today. I hope you found this useful. Make sure you are subscribed if you haven’t already to get the upcoming parts delivered directly to your inbox. In the upcoming parts, we will:
- Understand how to use API and the various query parameters
- Figure out a way to respect the cache rules mentioned in the Pixabay API documentation
- Creating custom data structures inside Blender that will be used by the addon
- Start building the User Interface for the addon
- And more…
You can get the source files for this part on Gumroad.
Read the Part 2 article here.
Subscribe to my newsletter
Join 1500+ Technical Artists, Developers and CG enthusiasts who receive my latest posts on Blender, Python, Scripting and Computer Graphics directly to their inbox.