Build a Hacker News client using Alpine.js
If you want to sprinkle some interactivity to your websites without much hassle, Alpine.js might be something you are looking for. Alpine is one of those tools that when you look at it, you cannot pass by without adoring its simplicity of design. It is a thin reactivity library that lets you add dynamic functionality to your websites directly in your markup.
Modern web-development space is so concentrated with libraries/frameworks like React, Angular, Vue, etc. so much so that they have become the default when it comes to building any website or application regardless of whether they are a good fit for the use case at hand.

I wanted to give Alpine a try by building a simple web application but I didn’t want to build a yet another todo app. 🙂 So, I decided to build a client for Hacker News instead.
Hacker News API
The official API for Hacker News is documented here on GitHub. But it’s very difficult to use and the response times are pretty slow. So, I chose the HNPWA API by David East for building the app. They have done some nice things with their API which will make your life much easier that you don’t get in the official one.
For example, when fetching the top stories, the official API returns only the ids of the top stories and you’ll have to call the item API separately for each story to get it’s details. Example response:
[ 9129911, 9129199, 9127761, 9128141, 9128264, 9127792, 9127732, ..., 9038733 ]
Whereas, the HNPWA API will return the top stories with all details and content in a single request. Example response:
[
    {
        "id": 34248908,
        "title": "Sahil has open sourced askmybook",
        "points": 3,
        "user": "salaivv",
        "time": 1672854705,
        "time_ago": "a day ago",
        "comments_count": 2,
        "type": "link",
        "url": "https://github.com/slavingia/askmybook",
        "domain": "github.com"
    },
    ...
]
And, if you notice, this has more convenient information like time_ago and domain that you can directly use without having to manually derive or infer them from the data the official API gives you.
Building the app
You can use Alpine directly with plain HTML, but I decided to go with Jekyll so that I can define and reuse components. There is a way to do this in Alpine using the x-html directive, but this involves fetching additional HTML files to render the page. But, Jekyll will directly inject these components into the HTML files during build time, so that you don’t need to keep making requests for components.
I won’t be talking about the Jekyll side of things much in this post, but TLDR, Jekyll is a Static Site Generator (SSG) that lets you create blogs entirely using HTML without a database or a backend. You can learn more about Jekyll from the official site.
The Hacker News website has sections (like newest, ask, show, etc.) that show a list of posts and a thread view where you can see all the comments in the conversation.
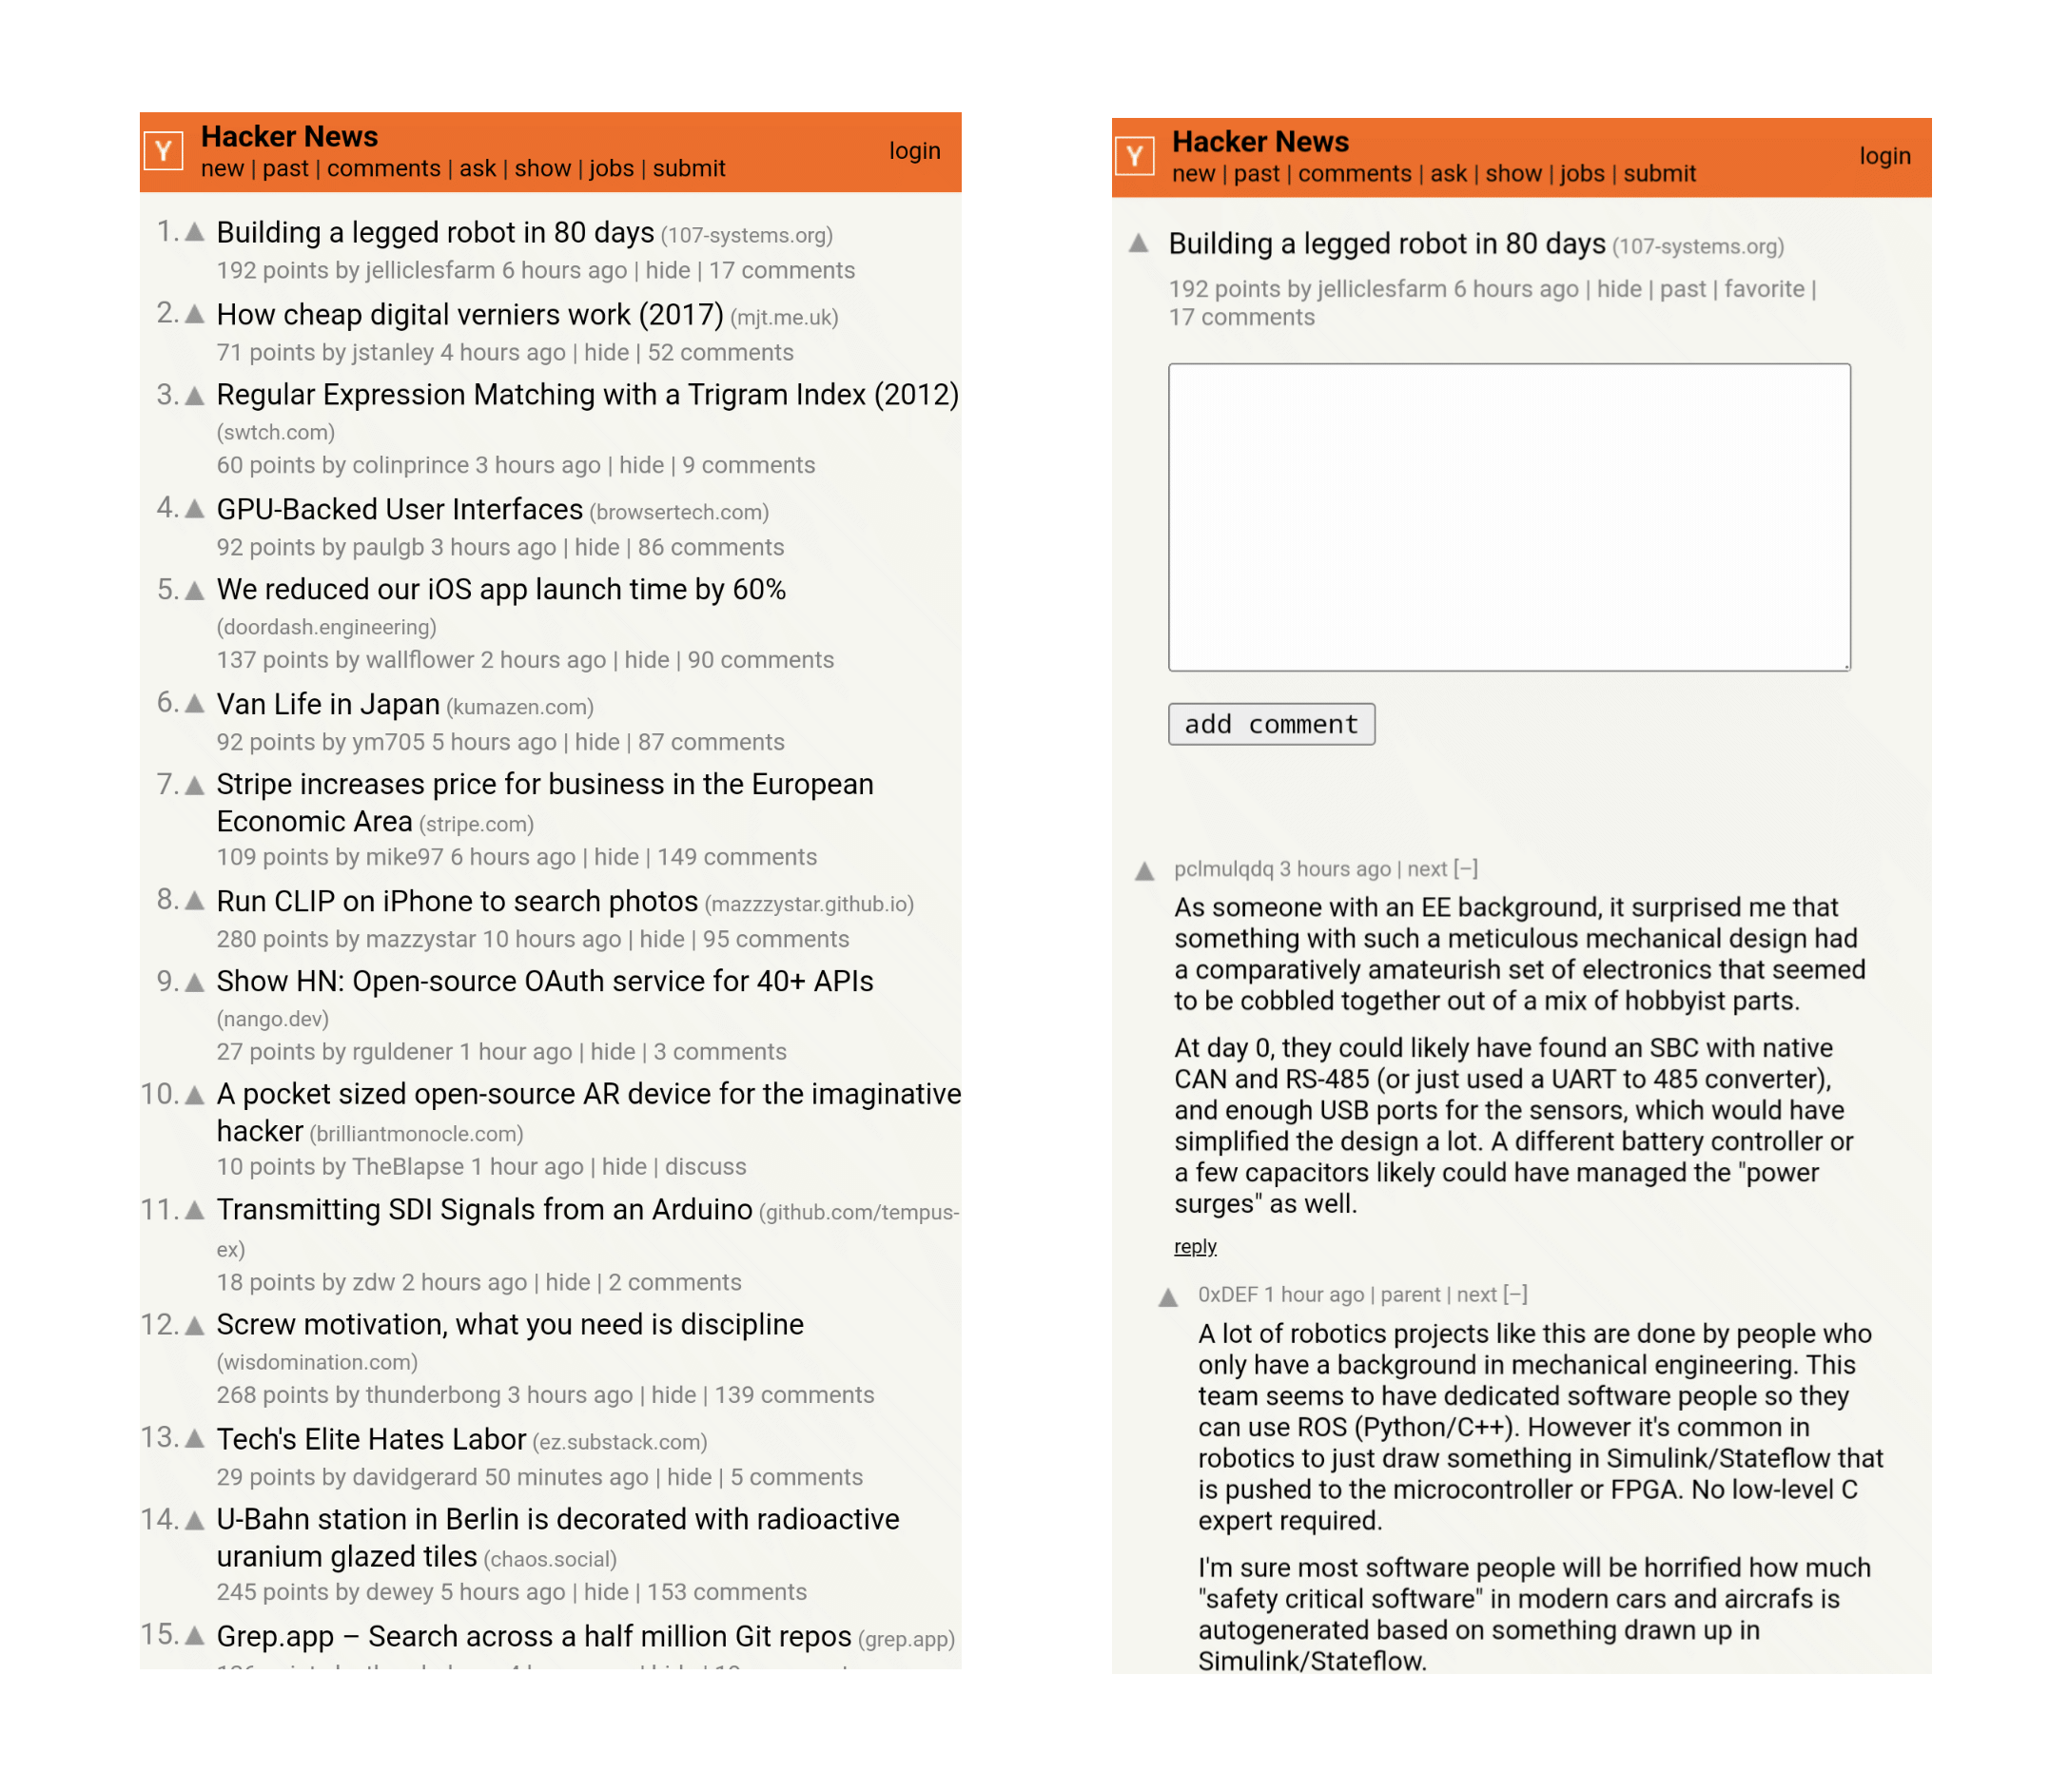
Initially, I thought of creating separate HTML files for each section (like ask.html, show.html, etc.). But, since all of these were similar, I decided to create a single file that would handle all these sections and one more for the thread view.
1. Creating the list of posts
In Alpine, the starting point for any component is a usually a <div> tag with the x-data directive. It tells Alpine that this piece of HTML is a dynamic component.
For example, you can declare something like:
<div x-data="{ name: 'Hacker' }">
    <h1 x-text="`Hi ${name}!`"></h1>
</div>
And this would output a <h1> heading with the content Hi Hacker!. You can also directly use x-data with any other tag, but usually we declare a top level <div> that houses the state and we access that state from the child elements.
If you notice in the example above, there is an also x-text directive. This tells Alpine to evaluate the expression and use it as the text content for that tag. You can use any valid JavaScript expression or statement as the value for these x directives.
For the list of posts, I declare a <div> tag with { stories: [] } as the x-data. So, when the element is initialized it will have an empty stories variable. Then next step is to fetch the stories and store it in this variable before the browser renders the elements.
Conveniently, Alpine has a directive for this: the x-init directive. This lets us do something during the initialization phase of a component. To illustrate, we do something like:
<div x-data="{ stories: [] }" x-init="stories = await getItems()">
    <!--Component code-->
</div>
Here, the getItems() function will run and populate the stories variable in our state when the component is initialized. The getItems() function looks something like this:
const BASE_URL = 'https://api.hnpwa.com/v0'

const getItems = async (section, page) => {
    res = await fetch(`${BASE_URL}${section}/${page}.json`)
    stories = await res.json()

    return stories
}
This code lives in a separate main.js file that is linked in the <head> section. But you can also put your JavaScript code inside a <script> tag directly in the HTML file.
Now that we have the stories fetched when our component initializes, we need a way to iterate through the stories and render them on the page. Alpine provides a yet another nice way to achieve this through the x-for directive. The x-for directive needs to be used with a <template> tag. E.g.
<ul x-data="{ names: ['White Hat', 'Black Hat', 'Grey Hat'] }">
    <template x-for="name in names">
        <li x-text="name"></li>
    </template>
</ul>
The above code will render an unordered list with the items stored in names.
We can apply the same technique to render a list of posts stored in the stories variable. The component looks something like this:
<div x-data="{ stories: [] }"
     x-init="stories = await getItems('top', 1)">
  <template x-for="story, index in stories">
    <div>
      <div>
        <p x-text="page == 1 ? index + 1 : ((page - 1) * stories.length) + (index + 1)"></p>
      </div>

      <div>
        <template x-if="story.hasOwnProperty('domain')">
          <a :href="story.url" target="_blank" rel="noopener noreferrer">
            <p>
              <span x-text="story.title"></span>
              <span x-text="`(${story.domain})`"></span>
            </p>
          </a>
        </template>

        ...

        <p>
          <span x-text="story.points"></span><span> points by </span>
          <a :href="getUserLink(story.user)">
            <span x-text="story.user"></span>
          </a>
          <span> | </span><span x-text="story.time_ago"></span><span> | </span>
          <a :href="getItemLink(story.id)">
            <span x-text="story.comments_count"></span><span> comments</span>
          </a>
        </p>
      </div>
    </div>
  </template>
</div>
If you notice, some href attributes are prefixed with a : symbol. This is Apline’s shorthand for the x-bind directive. The regular way to write this would be x-bind:href. While x-text allows you to alter the text content of an element, x-bind allows you to alter an attribute’s value by binding it with some stateful data. In this case we are binding it to the stories’ links.
And, you can also see I have used an x-if directive. This allows you to conditionally render an element on a page. In this case, I am checking if the story has a property called domain to display that within the paranthesis next to the title.
The code above is a simplified example. In the final app, you will find a yet another parent <div> that contains state about the current section and page the user is viewing and this data is read from the URL using the window.location.search property and in turn used to fetch the respective stories. Please have a look at my GitHub repo for more details.
2. Creating the thread view
We follow a similar technique to build the thread view. We start by declaring a top-level <div> with x-data that will house the data for that particular thread. But, the challenge with the thread view is reading the comments data from the API, and rendering a nested structure. Luckily, the comment data from the HNPWA API is nested, and has a convenient level information that denotes the nesting level of that particular comment.
In order to flatten the nested comments, I adapted the answer from this StackOverflow thread and a wrote a function called getComments(). It has an inner function called flattenComments() that is recursively called on the story object to flatten the comments forming a closure.
I then use the level information to dynamically set the margin-left for each comment like this:
<template x-for="comment in getComments(story)">
    <div x-init="style = { marginLeft: `${comment.level * 1.5}rem`}">
        <div :style="style">
        <p>
            <a :href="getUserLink(comment.user)"><span x-text="comment.user"></span></a>
            <span x-text="comment.time_ago"></span>
        </p>
        <div x-html="comment.content"></div>
        </div>
    </div>
</template>
As you can see, Alpine allows you to alter the markup, attributes and CSS entirely in your HTML.
3. Adding PWA config files
To make this into a PWA, we need to add some more files to our repo. The easiest way to do this is using the RealFaviconGenerator.
It basically allows you to upload an image, generate favicons at various sizes, and automatically provides you with a site.webmanifest and browserconfig.xml file with the information you provide. You can then simply copy the tags that it generates and paste them in your <head> section and unzip the favicon package in the root of your site. Doing this will allow you to install it as an app to your homescreen or desktop.
Conclusion
And that’s it! You can now deploy the app anywhere like Cloudflare Pages or Netlify, and you will be able to access the Hacker News feed from your client.
You can try this Hacker News client here.
P.s.
That’s it for now!
Let me know if you have been exploring or doing something cool with Alpine lately. 🙌🏼
Resources
- Try this Hacker News client here
- Official Alpine.js documentation
- Official Jekyll documentation
- GitHub repo containing the source for this client
- StackOverflow thread on iterating nested objects
- RealFaviconGenerator
Subscribe to my newsletter
Join 1500+ Technical Artists, Developers and CG enthusiasts who receive my latest posts on Blender, Python, Scripting and Computer Graphics directly to their inbox.